Repurposing old chairs is a great way to breathe new life into old furniture and add character to your home decor. With some creativity and imagination, you can transform old chairs into functional and stylish pieces that can be used in a variety of ways.
Whether you’re looking to create a unique planter, a cozy bench, or a trendy coat rack, repurposing old chairs is a fun and rewarding DIY project. Let’s explore some creative ideas for repurposing old chairs!
Make An Outdoor Swing
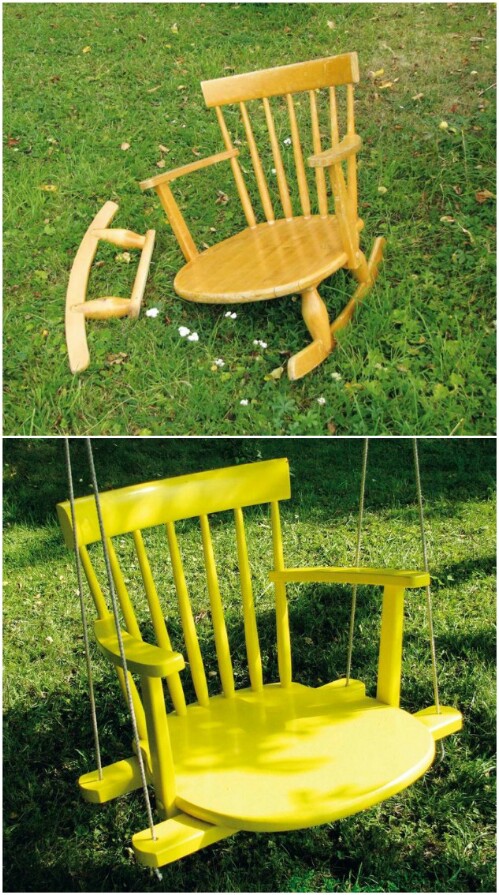
If you have an old wooden dining chair with broken legs, you can turn it into this wonderful swing. The kids and adults, too, will absolutely adore this swing, and if you’ve got a couple of chairs, you can make a swing for the whole family. You’ll need sturdy rope, and you’ll want to choose a tree that’s sturdy, too.
DIY Instructions: husohem
Make A Bathroom Shelf And Hanger
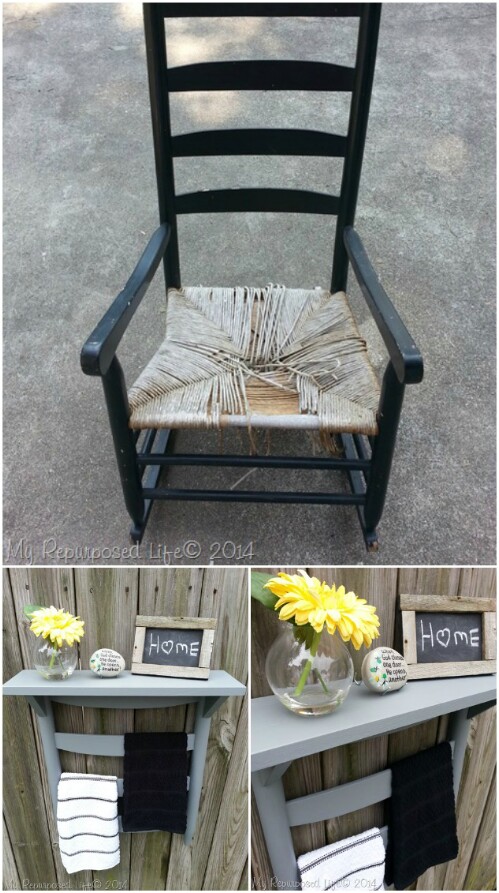
Use the entire chair for this bathroom storage project. Cut the seat down and create two shelves, using spindles or legs for hanging areas. This is a really great idea for kids’ rooms, too. Keep books or knickknacks on the shelves, or add hangers for towels or jackets. Paint, stain, or otherwise customize them in whatever color or style you want.
DIY Instructions: myrepurposedlife
Make A Picture Display
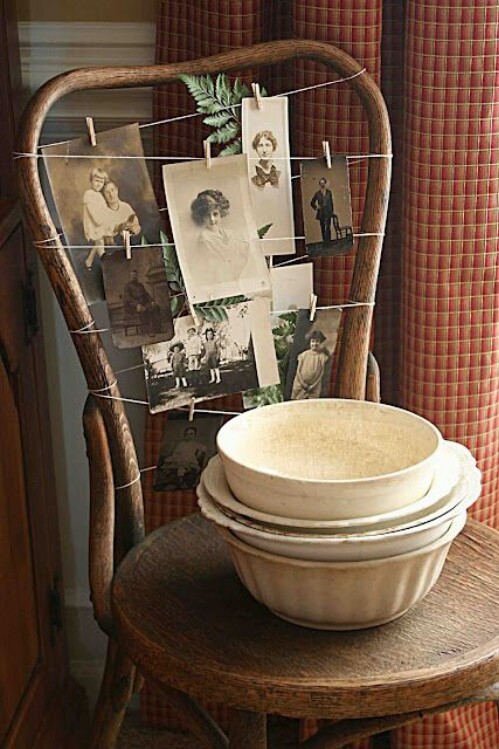
Okay, so if you have a chair that you can’t part with but don’t want anyone sitting on it because of a broken leg, you can turn it into a wonderful picture display without altering the chair at all. Just string some lines across the back and use small clothespins to hold your pictures. You can add a centerpiece or plant to the seat, too.
DIY Instructions: mamiejanes
Make A Scarf Holder

Hang those scarves in style and keep them organized beautifully with an old chair back. This is the perfect project for chairs with broken seats or legs because you really only need the back. You just remove it from the rest of the chair, add hangers, and use the spindles to hang and organize your scarves. Add a few knobs for belts or necklaces, too, and get that closet organized.
DIY Instructions: eveofreduction
Craft Living Room Tables

Turn that old furniture into new furniture! Use those broken old chairs to create these adorable living room tables. You remove the chair back, and you’ve got a table!
Warning – you may get completely addicted to creating furniture after seeing how easy this is.
Make Unique Clothes Hangers

When all else fails, make hangers! You can turn those old wooden chair backs into these amazingly unique and eclectic hangers. You just remove the backs from the chairs, and add the top of the hanger. Whether you use them to actually hold your clothing or you want to decorate with them, you have to admit that these are the most unique hangers you’ve ever seen!
DIY Instructions: designboom
Make A Doggie Bed
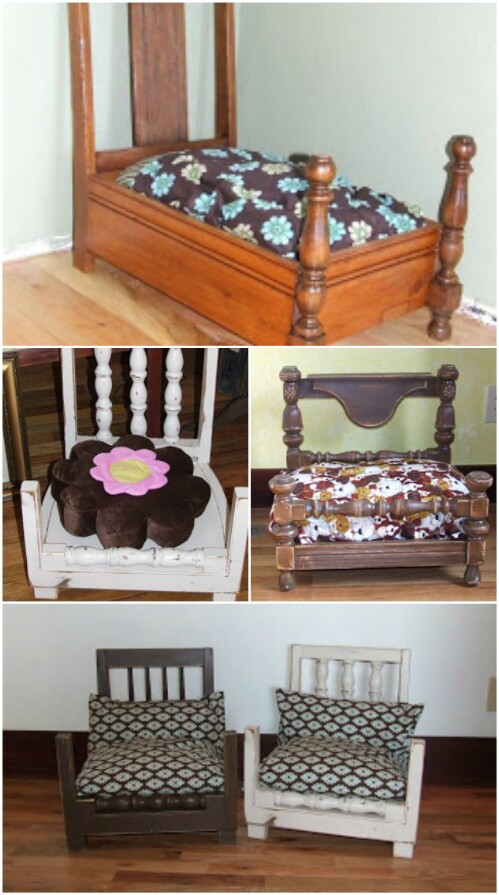
Creating a doggie bed from those old chair legs is wonderful. And, you have most of the chair left to make other projects. This one is really easy, considering it’s a bed, and your furry pet will love you so much for it. The bed is made from old dresser drawers, so this is a multi-repurposing project. DIY
Instructions: somethin-salvaged
Make A Bird Bath

An old chair adds charm to your front lawn and gives the birds a special place. This is perfect for old wrought iron chairs and is the easiest project. You’ll need to sand or paint the chair, however you want to prepare it. Then, just add a terra cotta pot to the seating area and fill the pot with water. Choose a shallow pot for your bird bath. DIY Instructions: daisymaebelle.com
Make Picture Frames
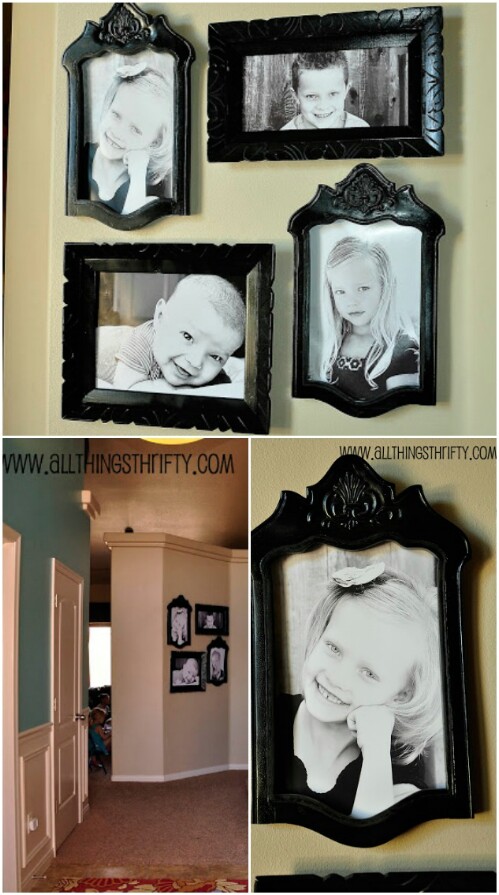
Picture frames? Yes! You can use those old chair backs to create beautiful frames to adorn your walls. Now, bear in mind that this one is a bit more complicated and involves a little more work. It will be worth it, though, when you see these gorgeous frames holding your memories.
DIY Instructions: allthingsthrifty
Create Jewelry Storage
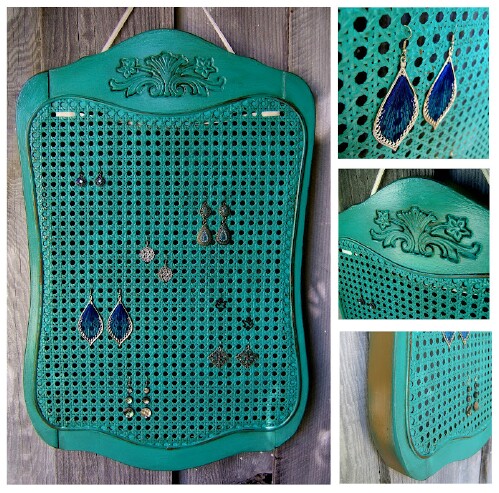
Those old metal chairs can get new life when you turn them into an amazing jewelry storage shelf. The small holes on the back of the metal chair are perfect for hanging earrings, and the entire look is rustic chic. You can paint the chair to match your existing décor or sand it down for a weathered look. Remove the chair back, add hangers to secure it to the wall, and you’ve got a gorgeous and really functional jewelry station.
DIY Instructions: ninered
Create A Stunning Porch Planter
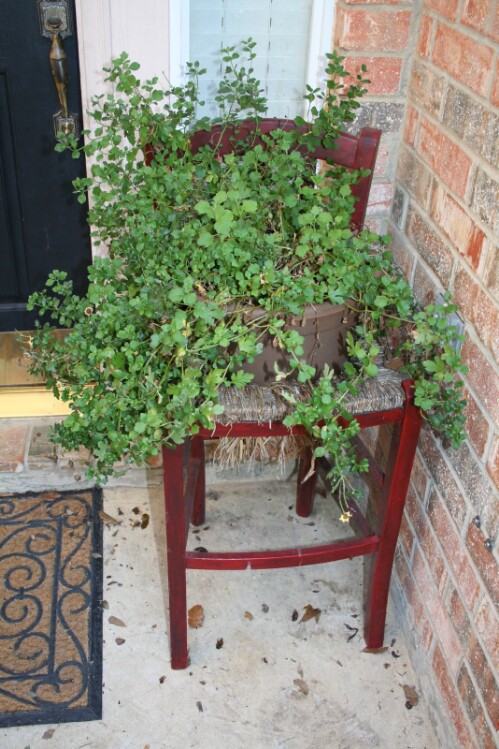
Use that old chair with the broken seat to create this gorgeous planter for the porch or even inside if you want. Imagine having one of these on each side of your door! They really give the porch a welcoming, homey look and are so easy to create. This is an especially good project to upcycle those broken chairs with wicker seats.
DIY Instructions: dukesandduchesses
Make A Drink Stand
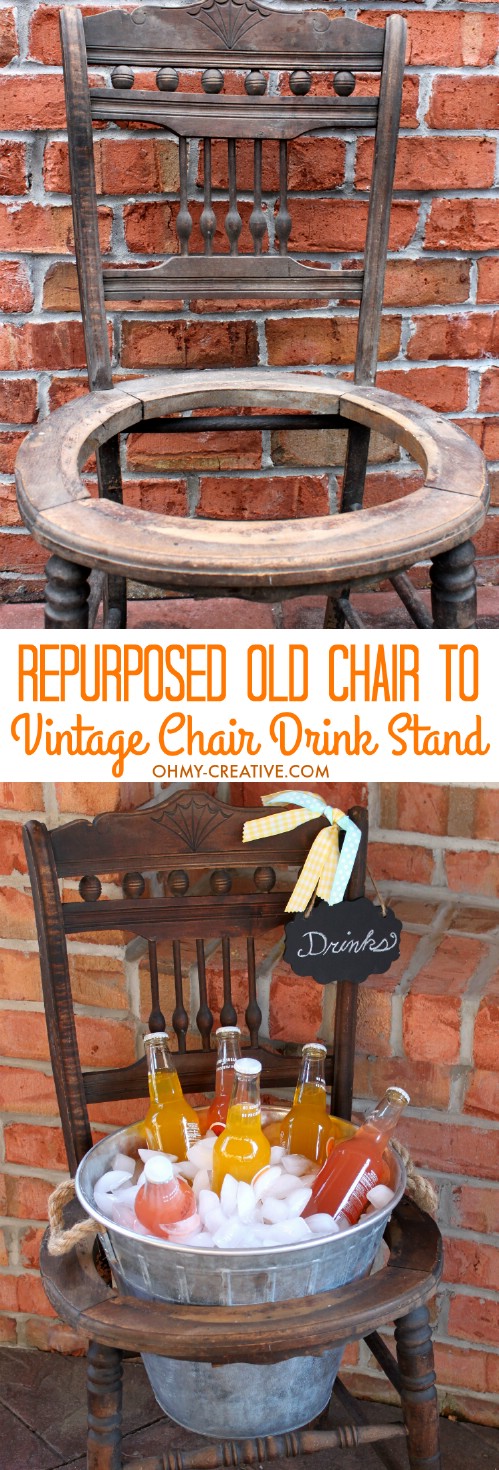
This drink stand, made from an old broken chair, gives barbecues and outdoor parties a really rustic look. This is the easiest project, and it’s so unique. You just cut a circle into the seat portion and add your rustic bucket to hold ice and drinks. Honestly, I can’t believe I haven’t seen these everywhere this summer!
DIY Instructions: ohmy-creative
Make A Rustic Garden Shelf
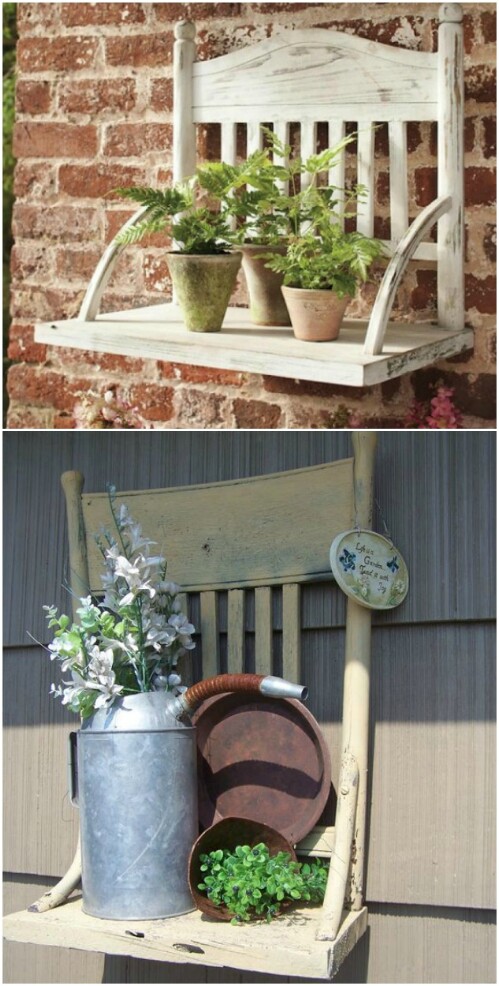
This broken chair turned garden shelf is a wonderful way to upcycle. You can use it to display plants on your porch or to hold necessities in the garden shed. This is the perfect solution for chairs that have lost their legs because only the seat and back are needed. Repaint and then sand it to give it a wonderful, weathered look.
DIY Instructions: pinterest
Make Shoe Storage
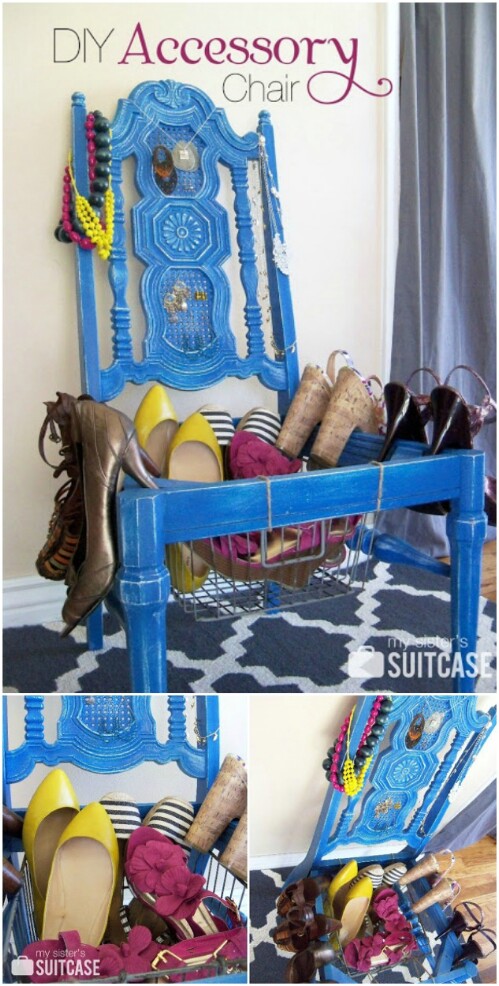
Whether you’ve got a huge walk-in closet or need something in the bedroom for all those shoes, an old chair works wonderfully. This is the most unique idea for repurposing old furniture, and it’s easy, too. A basket placed in a cutout where the seat goes is perfect for holding all types of shoes, and you can hang them from the back and sides, too.
DIY Instructions: sisterssuitcaseblog.
Make A Coat Rack

How gorgeous would this DIY coat rack look hanging in your foyer? Use the back of the chair, and add hooks.You can pick up coat hooks at any home improvement store, and you can either stain or paint the chair back, or just sand it down a bit for a more distressed look.
DIY Instructions: faceliftfurniture
Create A Sidewalk Chalkboard

Whether you have a business or want to add a quaint decorating aspect to your front yard, this sidewalk chalkboard made from a broken chair is perfect. It’s a great idea for weddings or parties, too. You can use a chalkboard or chalkboard paint if you prefer and create your own board.
DIY Instructions: knickoftime
Make A Hall Tree
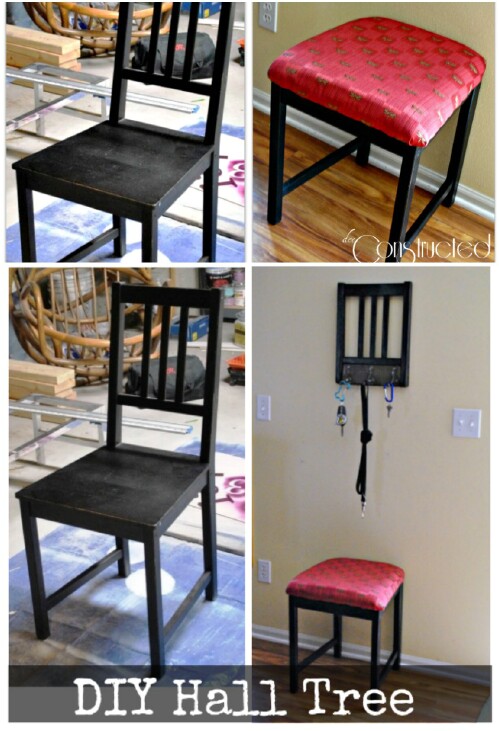
Disassemble the chair just a bit and create a really functional, not to mention gorgeous, hall tree. Add a cushion to the seat and a few hooks to the back, and you’ll have room for everything. Hooks give you a place to keep keys, leashes, or even jackets, and the seat is perfect for taking off your shoes when you get home.
DIY Instructions: deeconstructed
Create These Amazing Dog Feeders
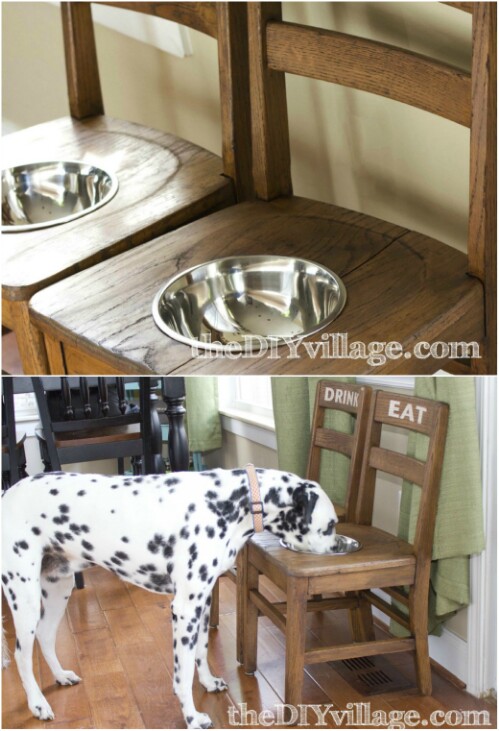
I absolutely adore these chair dog feeders. They’re perfect for taller dogs, particularly when they get older and can’t really bend to their bowls on the floor. You just sand down your chairs, cut out a section in the seat for the stainless steel bowls, and voila! You’ve got a gorgeous place for your dogs to dine. These are so easy and such a wonderful way to upcycle those chairs and give your furry family members a little extra special attention, too!
DIY Instructions: thediyvillage
Make A Storage Box
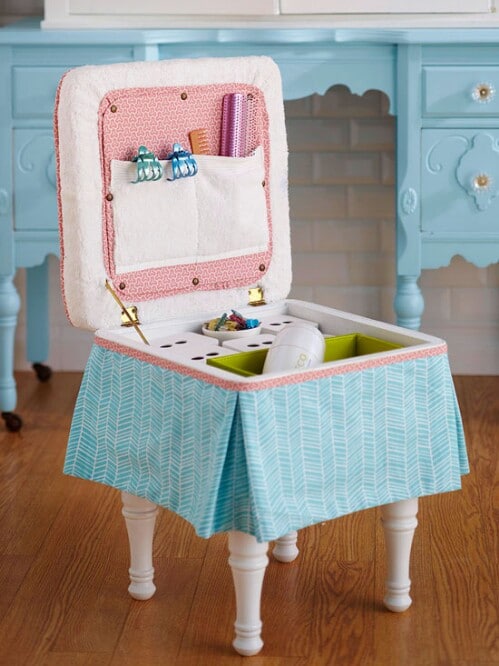
This storage box made from an old chair is perfect for hair, jewelry, sewing, toys, or whatever you need it for. You use the legs and seat from your chair and then add the cushioned top and liner. This is a relatively easy project, and one that you can finish in a weekend. It’s the perfect addition to your bathroom or bedroom, and you can create as many pockets or sections as you need.
DIY Instructions: bhg
Create An Outdoor Bench

Those old chairs can create this gorgeous and comfortable outdoor bench. Like up two or three, depending on how big you want your bench to be, create a custom cushion that ties them all together. You can sand them down to re-stain or paint, or leave them as they are for a more rustic look. This is a great project for a bit of stylish outdoor seating.
DIY Instructions: fourmarrsonevenus


