If you want to know how to start a blog, you’ve come to the right place. Whether you want to work from home, author a book, get more exposure for your existing business or simply write, starting a blog and/or website is highly recommended.
You can go from having no blog, to having a fully functional, beautiful blog in less than a half hour—and for not a lot of money.
Blogging is an absolutely wonderful way to earn an income doing something you love (whatever you love, cooking, sewing, gardening, photography—whatever it is, you can write about it). If you’re holding off because you think you’ll never “make it” big enough to make serious income, let us tell you, we never thought in a million years we could make a website like this. But now, we get to do something we love, and help people using this platform. You can, too! But first, you gotta get started.
Not all that long ago, we knew absolutely nothing about blogging. Our team was searching for a creative outlet and a place to funnel our ideas, but we had no idea where to start. It would have been so nice to have someone come alongside and say, “Here it is. This is how to start a blog. Here is everything you need to know.”
When we decided to start a blog, we had a slight fear of technology. We wanted to make sure the technical part of starting a blog wasn’t the thing that held us back from creating this website to share others talent and skills with the world.
Like us there are many of you who wish to start a blog every day but step back due to reasons like, I don’t know the technology, I am not good enough to learn new things, I don’t have sufficient time, it takes lot of time to start, blogging might be expensive so on and so forth.
Everyone has to start somewhere. So we decided to write a step by step tutorial on how to start a blog with WordPress. And yes its easy. If we can do it, you can do it too.
No more excuses! Today is your day! We are going to walk you through it step-by-step– let’s do this!
You might find this tutorial lengthy, but along with the step by step instructions, we tried to clear some basic concepts of blogging.
If your totally new to blogging you might need to read this tutorial a couple of times to totally digest the concepts.
What you’ll get from this guide?
By the end, you’ll have your own self-hosted WordPress site, one of the most popular kinds of sites around.
Put things on hold for the next 15 minutes and follow below steps. You’ll be up and running with your own blog before you know it.
Ready?
The THREE Simple Steps To Make a Blog/ Website:
- Domain Name and Hosting
- Installing WordPress
- Making it Pretty
I. Domain Name and Hosting
A website is an essential part of any profitable passive income business done online. There are a few free options like Blogger, Tumblr, or WordPress.com. Those are great options for some, but we don’t recommend that path for two important reasons:
- When you use a free service, your domain name will almost always be an “extra” extension to the service provider’s own domain. For example, if we created SadToHappyProject on Tumblr, the web address would be http://SadToHappyProject.tumblr.com instead of https://SadToHappyProject.com.
- You have fewer customization options for design, functionality, and revenue. For example, with free Blogger.com sites, you are limited to using only certain plugins. With some other free services, sometimes you are not allowed to advertise.
These two reasons alone are exactly why we recommend going with a self-hosted website. Also what if today you register your blog with free options like Blogger, Tumblr, or WordPress.com and say tomorrow these companies decide to close their service then what will happen to your blog?
With self hosted blog/ website, you have more control, it looks more professional, and you can truly call it your own. There is a small cost involved, but it will be worth in the long run to have total control over your own site.
Domain Name:
Your blog is uniquely identified by your domain name on the internet. For example, http://SadToHappyProject.com is our domain name. Like a shop is identified by its name in the market.
You’ll need to do some research before you choose a name for your blog. You want something that fits you, your blog, and is unique and will help you stand out in a positive way.
If you need a little help in this area, check out http://www.namemesh.com . It allows you to type in some key words you want to use in your domain name and suggests available combinations.
Since you have the perfect name, you now need to register it so no one else steals it. You could choose to register it where you purchase your hosting package. We’ll talk about setting up hosting in a minute and give you an example of registering both parts together.
Another option would be to purchase your domain name separately from your hosting package, which some would say adds an extra layer of security but can also complicate things a little. We started out with both our domain name and our hosting package at the same host.
If you want to register your domain separately from your hosting, we recommend using GoDaddy for your domain. Their site is super user-friendly, and the prices are really affordable.
If you’re just starting out, we recommend you keep things as simple as possible and take advantage of the free domain name you get with Bluehost*.
Decide which hosting provider to use:
If we take again the shop example into consideration then domain name is your shop name and hosting is the location of your shop. That is where your shop is physically present.
Having a domain name is not sufficient, you need a hosting provider to host your website. Hosting is like renting space on the web to display your blog. A host provides server space for your site so others can find you on the internet.
You want to pick a trustworthy host because if they have problems, you have problems. Your host is where your blog “lives,” so it affects your site speed and accessibility.
Support is also an important factor to consider when choosing a host. You want to be able to call when an issue arises and have it fixed right away to avoid blog downtime as much as possible.
There are two hosting services we have used and been happy with: Bluehost* (which we would call a good “beginner” option and the easiest to setup), Hostgator* (another cost effective and user-friendly option to start with).
For a better hosting experience you can also try using latest Windows 10 Virtual Desktop as it has on going offer for low cost Windows Virtual Desktop Pricing.
Bluehost*. This is the option we most often recommend for someone who is starting a blog for the first time. We used Bluehost* for sites that we’ve set up in the past and always received really good service and support for them as well.
Site speed with Bluehost is good. Bluehost offers hosting for an incredibly reasonable $3.49 per month through our discounted link when you sign up for 36 months. (You pre-pay for all 36 months up front, but if you decide to cancel at any time, they offer a money-back guarantee. So if you had Bluehost for 6 months and decided to switch, they would refund the remaining 30 months.) You really can’t beat the value for your money and the excellent service with Bluehost*.
In fact, for the large majority of new bloggers, Bluehost* is the perfect place to start, so we’re going to use them in our hosting setup example.
NEW!!! We recently recorded a screencast to show you how to get set up a domain name and hosting and install WordPress! We’re going to walk you through the steps of getting started with Bluehost*.
Don’t be intimidated by the fact that there are many steps– that just means we’ve broken it down to make it really easy for you! Here we go!
Don’t wait. Today is your day to start a blog/website!
Disclaimer: Please note that some of the links below are affiliate links, meaning, at no additional cost to you, we will earn a commission if you choose to make a purchase through those links. We have used all of the products listed below and recommend them because they are helpful and are companies that we trust. Thank you for your support in this way.
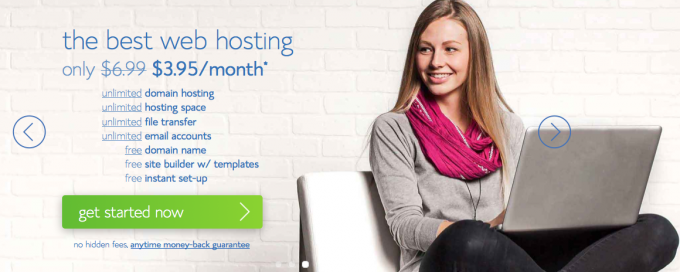
1) Start by clicking here to go to Bluehost* (this link will open in a new window so you can reference these instructions as you work). We have been a paying customer of this company for many years and can vouch for them. You’ll be re-directed to Bluehost through our affiliate link and you may get a few additional perks for signing up through this link. (Thank you for your support!) Click the big green “Get Started Now” button.
By the way, the images you see here may vary slightly from the ones you see on your screen. This is because they never stop making site improvements. Don’t worry, the general process is the same.
Choose the plan you’d like to start with. For beginners Plus (the middle one popular plan) is more than sufficient. Note that all plans come with one free domain which is good.
If your budget is super tight (We’ve certainly been there!), go ahead and choose the first plan from left side, i.e, basic plan. You can upgrade at any time.
Please note the name of the below plans may vary from time to time. Sometimes they are named as Standard, Business, Pro plans.
Just click one of the green “select” buttons to move to the next step.

2) You’ve already decided on a domain name at this point. To register your domain name with Bluehost, enter it under the “new domain” box and click “next.”
Bluehost * has great rates and gives you your domain name for free if you decide to host with them.

If you don’t have a domain, enter a new domain name on the left. (See tips for choosing a domain below). Make sure .com or the correct extension of your choice is selected from the drop down menu beside it.
If you’ve already registered a domain name, enter it on the right (don’t worry, it won’t mess things up if you’re using the domain elsewhere, this only identifies your account).
At this time it may ask you to create a new account or login in with your existing account to proceed further. Please do it.
3) Enter all of your account and contact information.

4) Continue down to the “package information” section. You get the cheapest monthly rate by selecting 36 months. It’s important to note that Bluehost charges you for the full the 36 months upfront. You are prepaying for the hosting.
That’s one of the reasons they are able to offer great hosting at such a small price. They always have that money-back guarantee, though, so you won’t risk losing your money.
If the upfront cost is too much, you could always consider pre-paying 12 months. If that’s still too much and you’re just not sure, go with Hostgator.
In case if you wish to pay hosting charges on monthly basics you can go with Hostgator*.

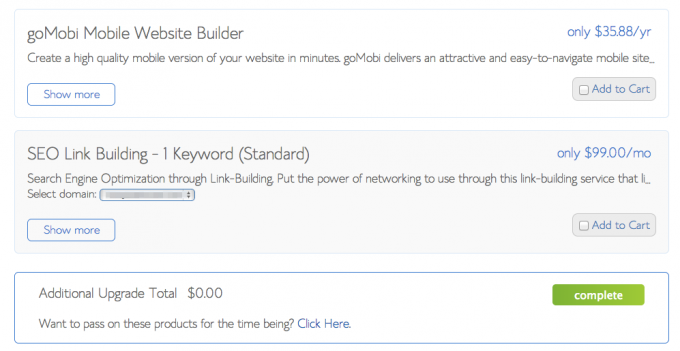
5) There are other services available on this screen but don’t worry about those at this time. You can always buy them later.
We would recommend setting up some sort of backup system for your blog somewhere other than with your host so that you don’t lose all of your hard work if your site would crash or your host would have a problem.
When I first started, we backed our site up to Dropbox using a plugin called WordPress Backup to Dropbox.

7) Again, there are some additional options you can purchase here, but at this time NO. These could be added later if you need them. Click “complete.”
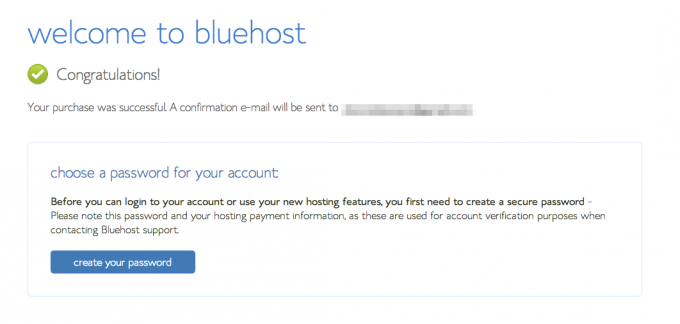
8) Congratulations! You officially have a Bluehost* account. Next you need to create your password.
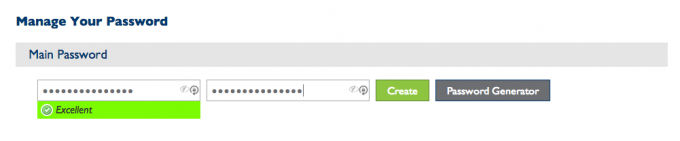
9) On this screen, you’ll create your Bluehost account password. Don’t forget it! (And of course make it a strong password so no one can hack your site!)
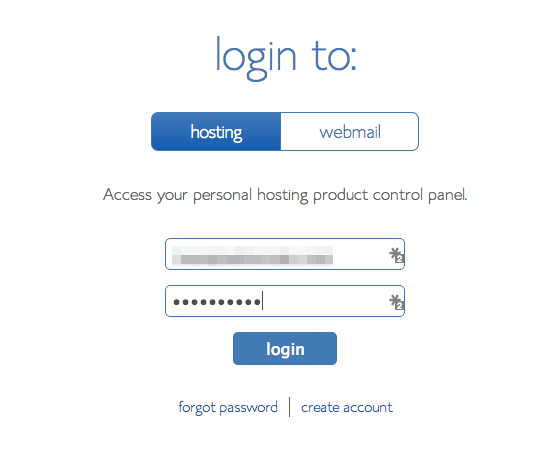
10) Now that your password has been created, you can log into your account for the first time! Make sure you’re logging into “hosting” and not “webmail.”
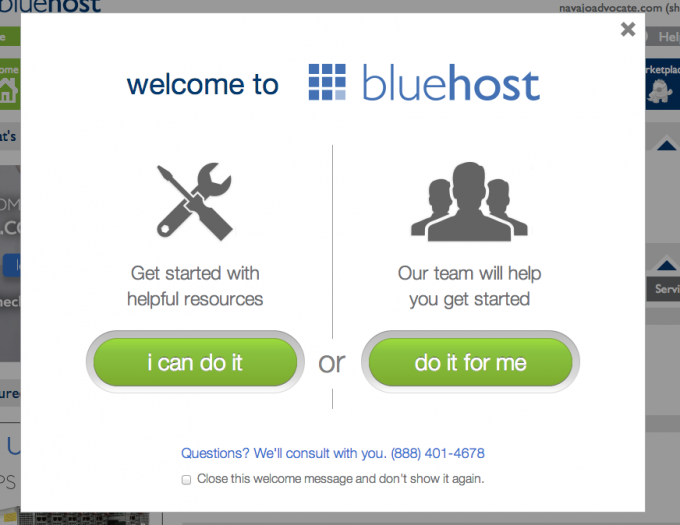
11) When your account opens for the first time, you’ll see a helpful little welcome message.
Fortunately we walking you through the process, so select the “close this welcome message and don’t show it again” button.
II Installing WordPress
12) Once you close that window, you’ll be in your account dashboard. You will get very familiar with this page.

First things first– you need to install WordPress.
WordPress is a blogging software. It’s the software that we use for Sadtohappyproject.com. The best part is that it’s SUPER easy to use and it’s also super easy to install on your website. BINGO.
With wordpress you don’t need to know the coding part. You can easily write your articles and publish on your website with wordpress.
- WordPress software is free.
- Full of features to make your blog pretty and have fun add ons.
- Highly customizable (especially with web design/development knowledge)
- Easy-to-use without coding knowledge
- Wide-variety of free and premium themes
Click the “install WordPress” button at the bottom of the screen.
13) On the WordPress Installation screen, click “Install.”

14) Click “show advanced options.”

15) Name your site (you can always change it later), create a username for the WordPress install, and create a WordPress login password.
You’ll want to make sure that “Automatically create a new database for this installation” and “I have read the terms and conditions” are checked as well. Click “Install Now.”

16) Watch the little bar at the top of the next screen turn green. That means WordPress has been successfully installed.

17) Now check your email. This email is important, so make sure you save it!
It includes your website URL, your WordPress admin login URL, and your WordPress login username.

18) From the email in the previous step, click the Admin URL.
It will take you to a site that looks like the one below. Enter your username.

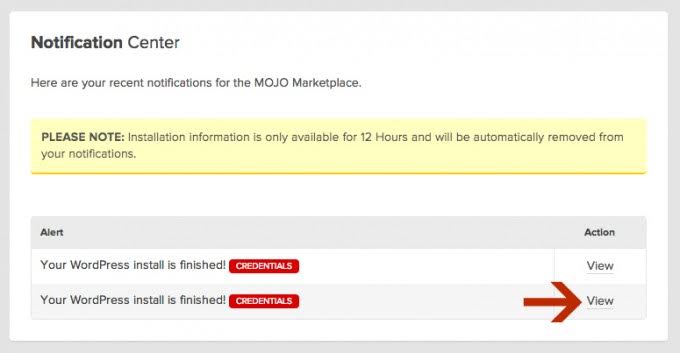
19) To retrieve your password, navigate back to your Bluehost* tab and click the very bottom “view” to see your WordPress password.
Remember, this alert expires after 12 hours, so make sure you get the password within that time period.

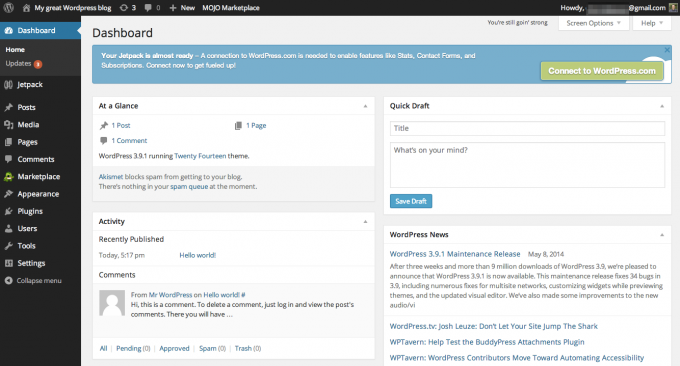
20) Now that you have your password, you can log into WordPress and you’ll be presented with your WordPress dashboard.
WordPress dashboard is the area from where you will write your articles and publish on your blog/website.
There is absolutely no need to have coding language. From here you can add images, audio, video to you site and do every damn customization.
You will learn to love this. Spend some time going through the various settings. It may be confusing at first, but in no time it will all be second nature.
At this point, you officially have your own food blog! Wahooooo! How does it feel? Welcome to the blogosphere, my friend!
You did it! Yay!!!
III Making it Pretty
Now you want to make your blog pretty, right? In order to do that, you will need to choose a theme.
Website theme consists of many things which you must have noticed on other website. It may include social media buttons, Follow us button, Icon, Menu Bar, Home Button, Subscribe button, Navigation bars etc.
Website theme determines the look and feel. With right website theme choice you can enhance your visitors overall experience, improve the visitors engagement, increase your sell etc.
WordPress has tons of free WordPress themes to pick from. You can scan through the options here.
However if you’re looking for a premium theme, you can buy from below popular sites:
- Restored 316 Designs – If you are a woman and you are a blogger (or would like to be a blogger), you must check out Restored 316. Not only are all of their designs gorgeous and lovely and feminine, but Lauren, the designer, is also the sweetest and most helpful person you will ever email. She’s truly the best ever. So go look at her designs. And then buy one.
- The Thesis Theme– These themes are very popular among bloggers.
- The Genesis Framework– This is another popular option to start with.
- Elegant Themes– Elegant Themes looks great, is easy to use, and has quite a few different options. It’s also a bit cheaper then the other premium themes listed here. Take a look and see what you think.
- Magazine Themes – These are good for lifestyle related blogs.
While selecting any theme make sure its a responsive.
Meaning that the theme auto adjusts itself while opening the website from desktop, mobile etc.
If you ever have any questions about the technical side of setting up a blog, please ask away HERE, and we’ll try to help as best we can.
If you wish to know the tools, wordpress plugins we are using on our website then head over to our Resources page HERE.
Now go out there and rock the blogging world!!
We wish you all the very best and are happy to hear your success stories.
Good luck guys 🙂