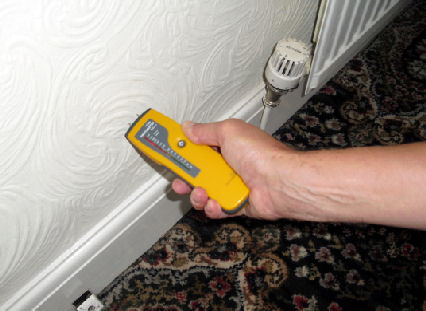
What is Rising Damp?
There are three main types of damping – penetrating, rising, and condensation. Out of three, rising damp is the relatively rare kind that affects walls inside a house/building. It typically occurs when the groundwater travels up through void space between bricks via the capillary action.

The void space between porous building materials sucks up the water like a straw. And since groundwater contains salt, you will see salt bombs collected at the point where rising stops.
Other areas typically affected by the rising damp include – timber, wallpaper, plasterwork, joists, skirtings, and the floorboard. All of these materials absorb water easily. As a result, you may notice rotting timber and folding paint. In worse cases, the mortar may start to crumble.
Causes of Rising Damp
It’s good to look into the following causes that might have rendered the existing DPC inefficient leading to damp issue –
- Look into the wall insulation (if you have) and check if it is properly installed. The insulation should never go beyond the DPC level.
- Broken or blocked drain pipes, guttering, flashing, and damaged roofs can contribute to rising damp. All of these can allow water to seep into the walls.
- Get the renderings and brickwork of the chimney inspected for any damage. See if the waterproof surface is damaged or not.
- Make sure boilers, bathrooms, and kitchens are well ventilated to lead the moist air out. It’s good to have high-quality dehumidifiers to maintain the right levels of humidity in the house.
- See if the grouting and waterproof sealant is intact between shower trays, bathtubs, and walls.
- Check for any leaky pipes; especially around the joints.
Signs of Rising Damp
The treatment for rising damp can be tricky. It’s not uncommon for many homeowners to misdiagnose the situation. Therefore, it’s vital to get a word from qualified damp surveyors and professionals.
At times, it’s hard to tell rising damp from penetrating and condensation damp. Having said that, there are some commoner signs that you may look out for to spot rising damp:
- Salt tide marks across the horizon on the wall
- Dark, musty patches on the wall. Walls that are damp to the couch. Pay close attention to masonry and brickwork (not just wallpaper and paint) to truly distinguish rising damp.
- Stained wall coverings, blistering paint, and peeling/folding wallpaper.
- Musty/damp smell that’s mostly unpleasing.
- Fragmentation and discoloration of the plaster.
- Decaying timber, floorboards, skirting, and joists.
- Mold and mildew growing on walls/furniture.
- The crumbling mortar between stonework and bricks on the outside of building walls.
- Rusting iron fasteners
Possible Treatments For The Rising Damp
Damp Proofing Injection Treatment
Chemical injections, if installed correctly, can be highly effective in undoing the damage of damp. Over the years, the formulation has improved significantly. Today most of these chemical injections offer lasting protection against moisture and dampness. Kiesol C happens to be the strongest damp-proof cream injection on the market.
It’s important to replaster the affected area after it has been injected with the chemical. Since it’s possible for the present plasterwork to hold a certain amount of hygroscopic salt, you may want to have the affected spot completely replastered. This will avoid the chances of plaster re-absorbing the water and leading to salt contamination.
Inserting a New DPC
Many of the old constructions and buildings lacked a damp-proofing course. It’s also possible, on occasion, for the existing DPC to become inadequate and fail to function properly. In both of these cases, it’s possible to go with the insertion of a brand new DPC.
The process typically entails drilling small holes in the affected area. This allows for the new DPC material to be filled in. Once it’s fed into the hole – you have to allow the material to dry up fully. The professionals will completely strip away the existing plaster to remove the salts.
Like in the previous treatment, doing so minimizes the chances of salt contamination in the treated area. After the new DPC has been installed, the wall is now ready for renovation and replaster.
Applying a Damp-proof Membrane
Finally, after you’re done with injecting the DPC, it’s good to install a waterproof membrane. This could be done before or after you have replastered the wall. It also helps the plaster to dry more quickly. It’s good to add a silicone-based, fungicidal additive to the plaster mix. If there are cases where it’s impractical to remove the older plaster, it’s possible to use a certain product known as Platon plaster base.
It’s a high-density clear polyethylene membrane. What it does is – essentially isolate the older plasterwork from the new one. It, therefore, eliminates the need to get rid of hygroscopic masonry. This is a labor-intensive method and should only be done by professionals.
Final Thoughts
When dealing with rising damp, the earlier you can take action, the better. If left untreated for a long time – it could damage your walls, floorboards, and alsobbring major costs in restoration and repair works. Let’s not forget it could also reduce the market value of your property.


