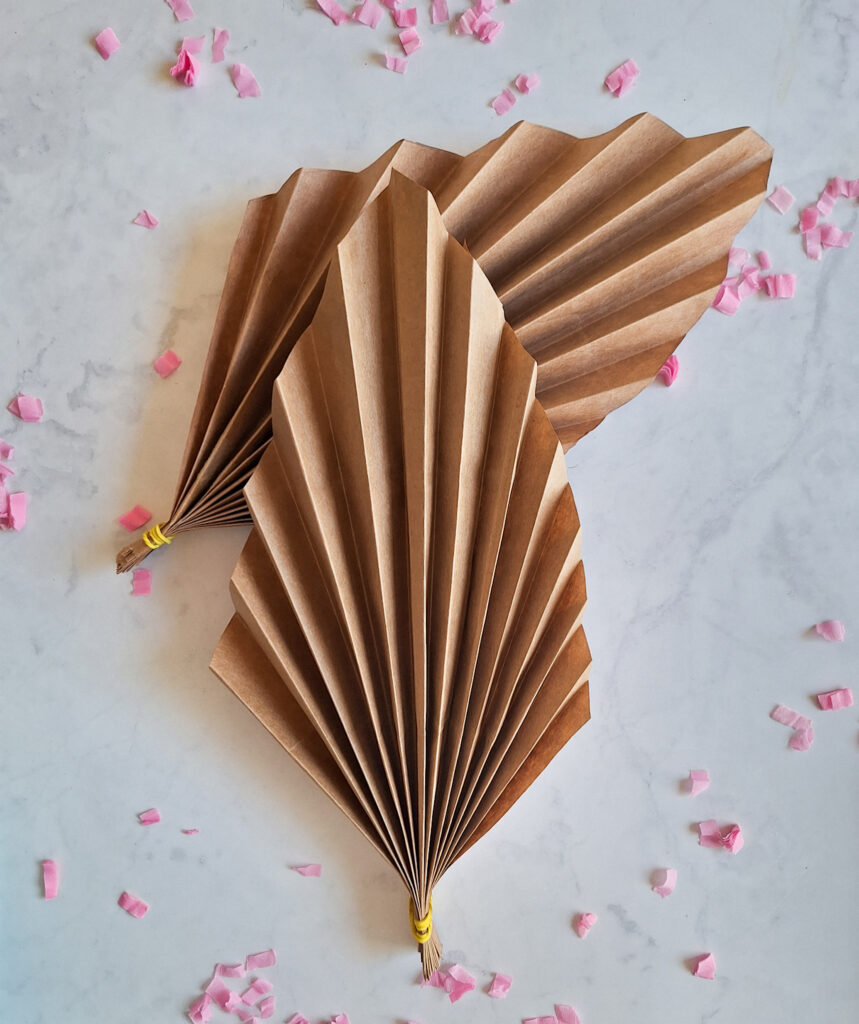
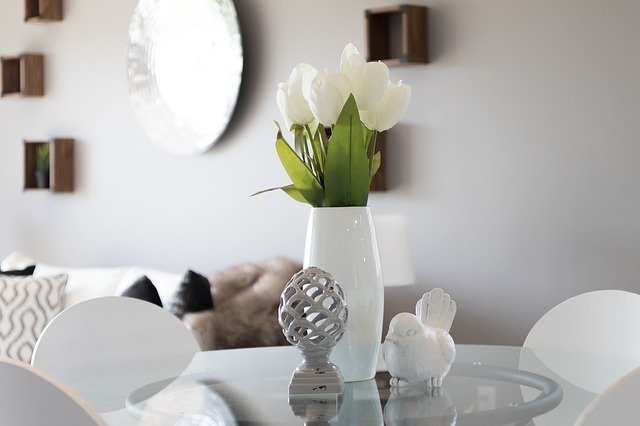
This paper leaf craft is a fun and easy project that anyone can do. All you need are some recyclable paper bags and a few rubber bands—it’s really that simple! Once you’re finished, you’ll be amazed at how beautiful the results are. These leaves make a great addition to your living room or bedroom walls, and no matter where you put them, they’re sure to look stunning!
It’s a perfect DIY project for those who love crafting but don’t want to spend a lot of money or time gathering supplies.
Supplies
- rubber bands
- scissors
- pencil
- recyclable paper bag

Instructions
Step 1: Cut along one edge of the paper bag and trim the bottom.
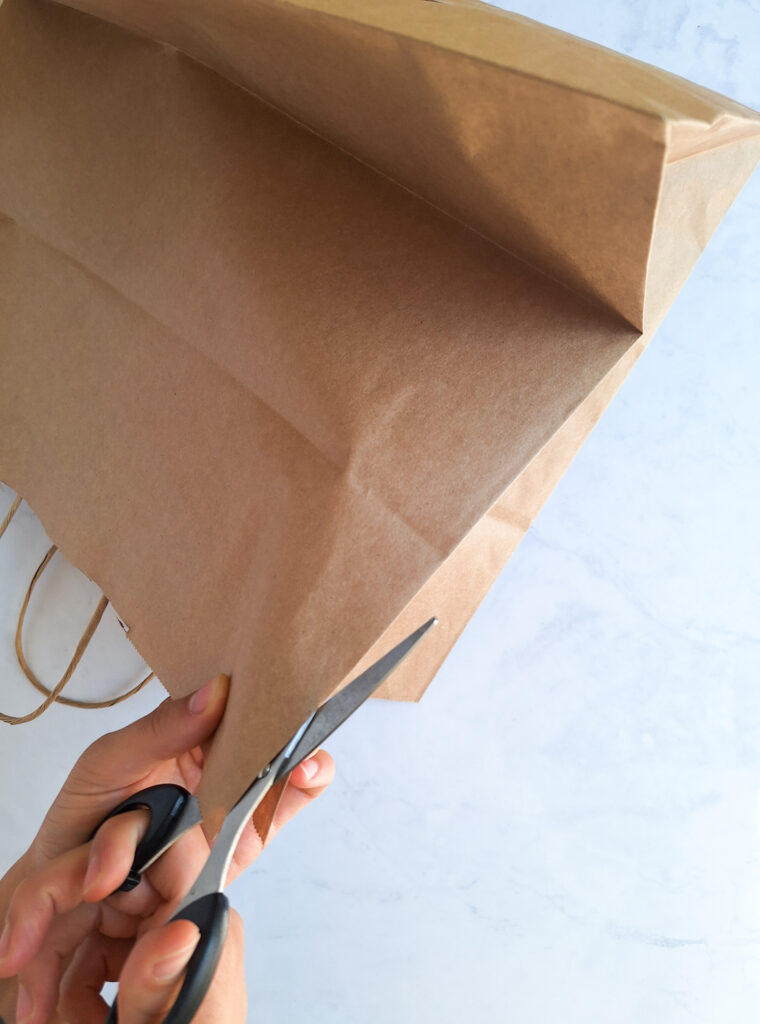
Step 2: Detach the bottom part.
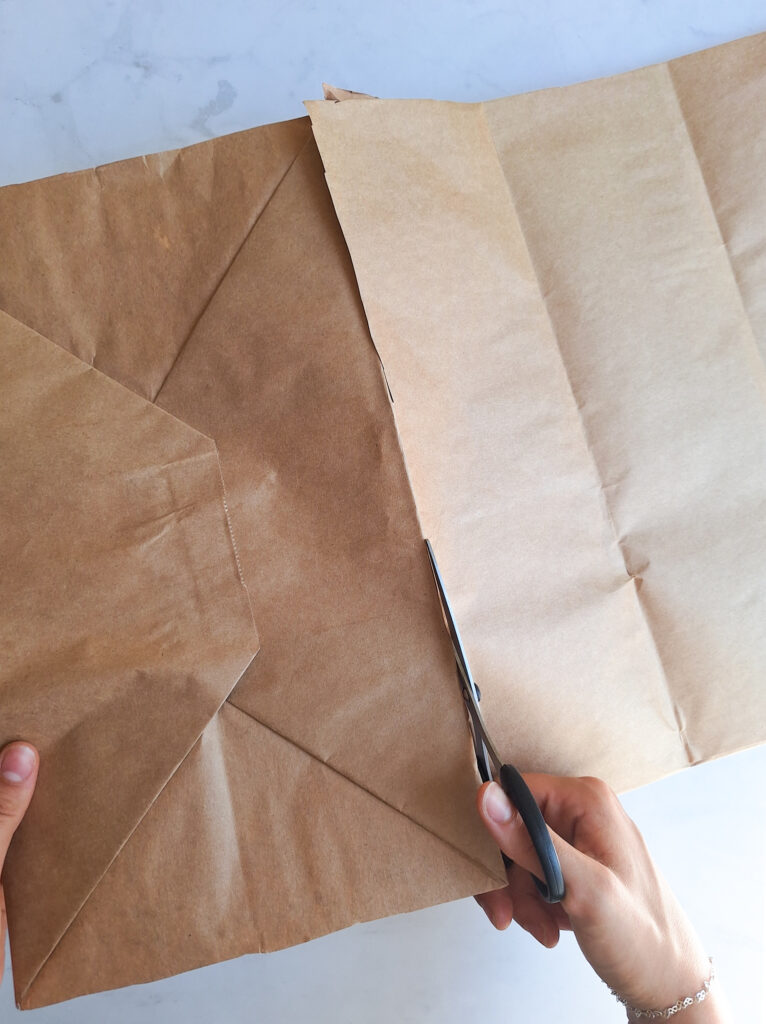
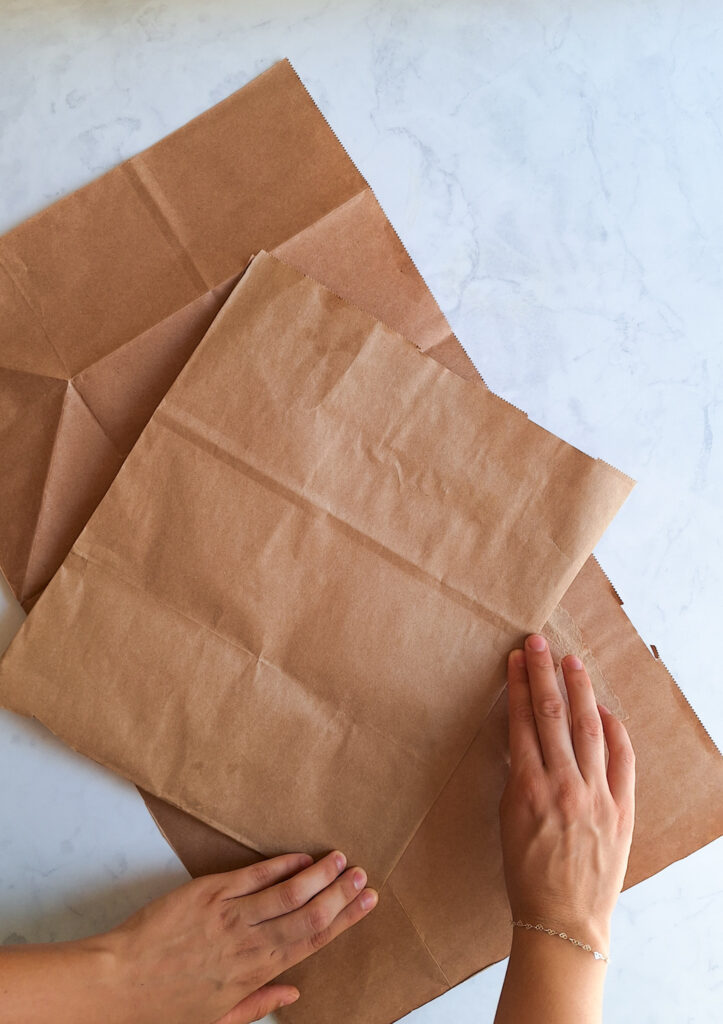
Step 3: Cut along the crease to create two sheets of paper of the same size.
Step 4: Remove the handles from the bag, or they will get in the way.

Step 5: We’ll start by folding the sheet in half vertically.
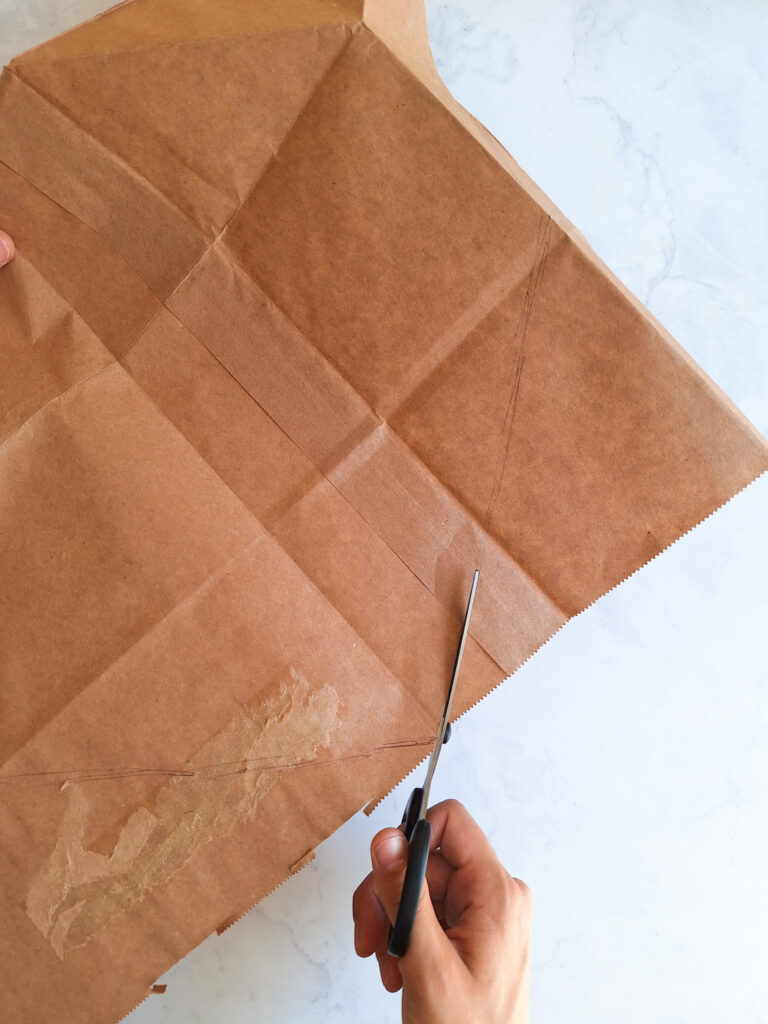
Step 6: Draw two sides of a triangle, with the tip of the triangle at the center crease.
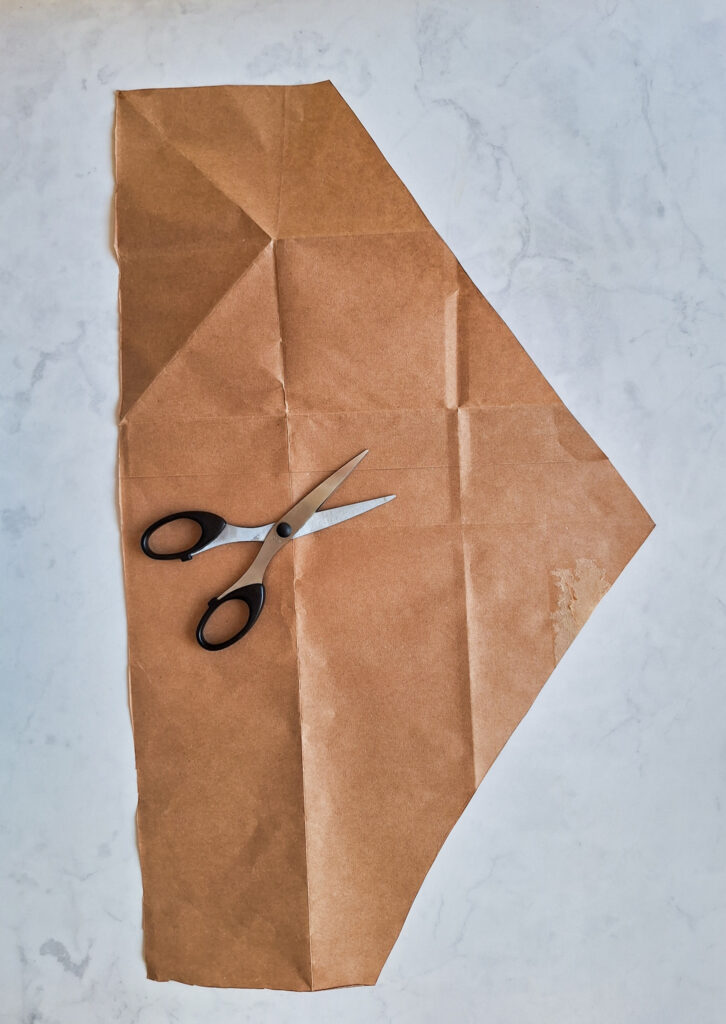
Step 7: Cut along the lines you’ve drawn. You should end up with a sheet that resembles a triangle on top of a rectangle.
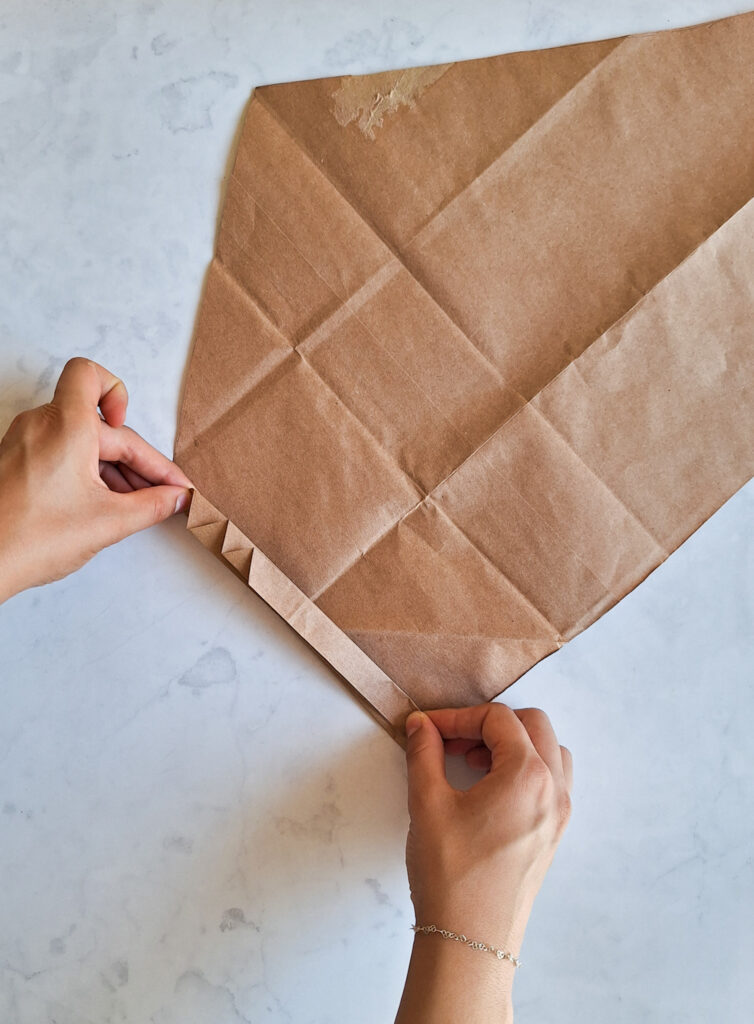
Step 8: Starting from one side of the rectangle, begin to fold it in an accordion style.
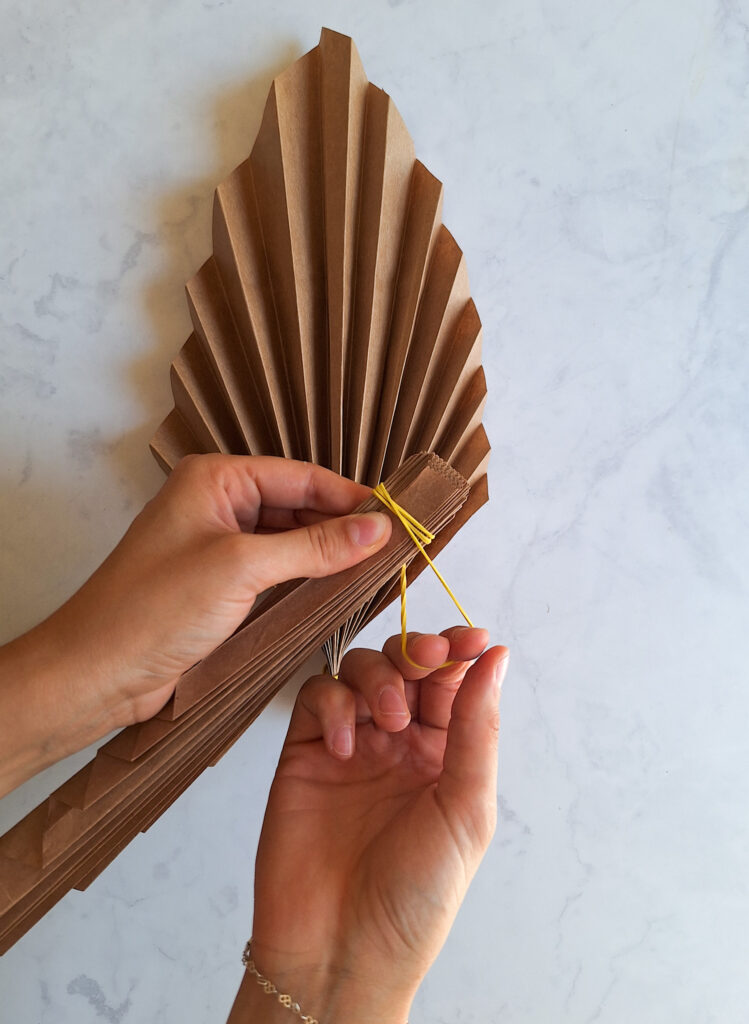
Step 9: Once you have completed all the folds, take a rubber band and secure the end with a knot.
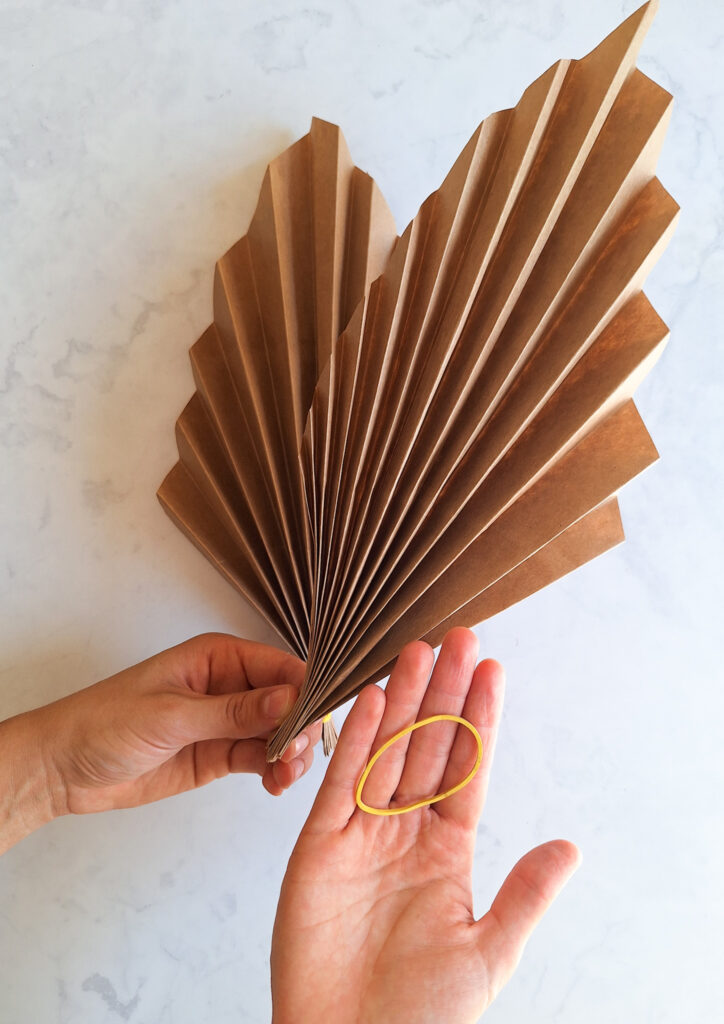
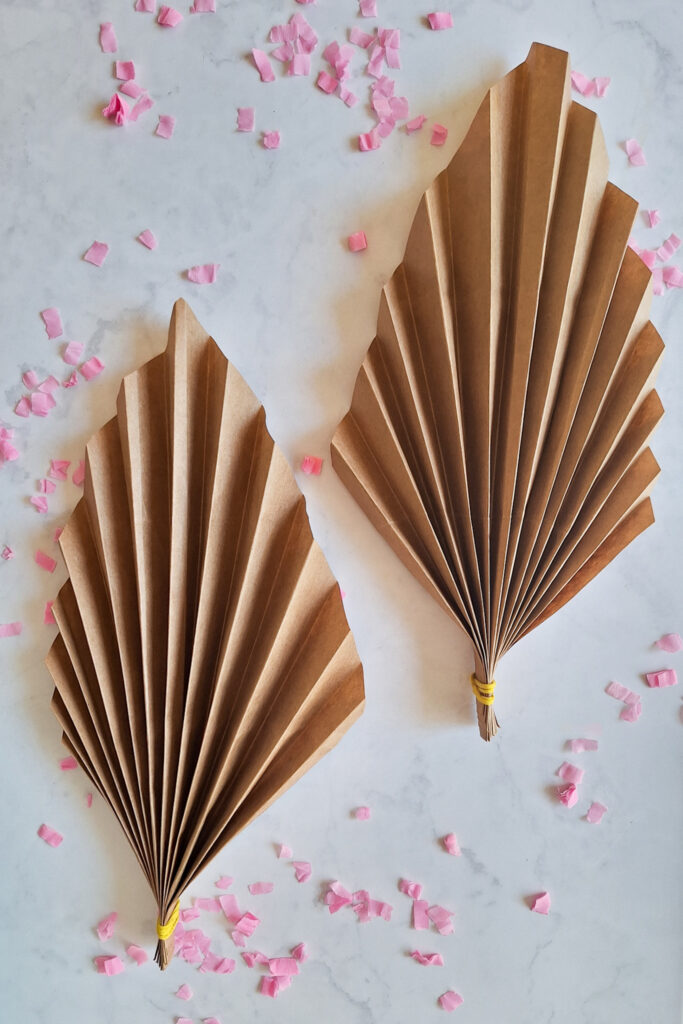
And that’s it. The result is absolutely stunning.
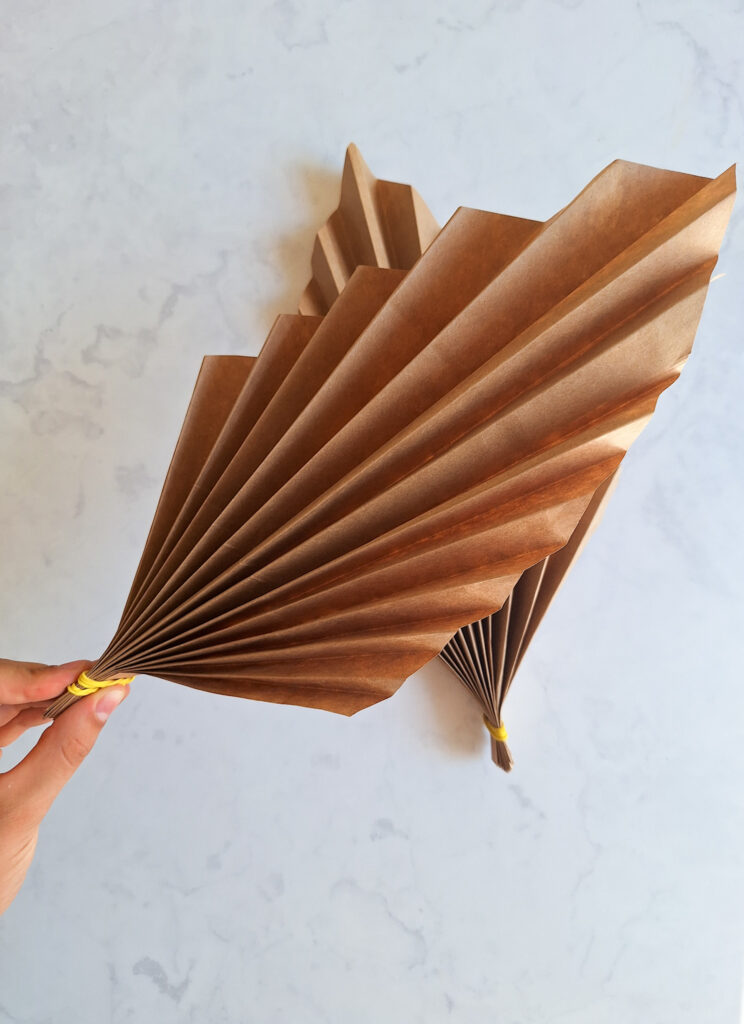
You can hang these on a wall in the living room or bedroom. They make perfect wall decor at a minimal cost.